For my February baking challenge, I wanted to make a fun, delicate treat for Valentines Day and retry a technique that I didn’t master when I originally attempted it – making jam from scratch. The recipe that met that criteria was Linzer cookies with raspberry jam. I fused two different blog posts for my kitchen creation – the jam was from this site and the cookies were from this site. The entire process for these cookies took DAYS and was a way longer time commitment than I anticipated, but was overall a pretty fun experience.
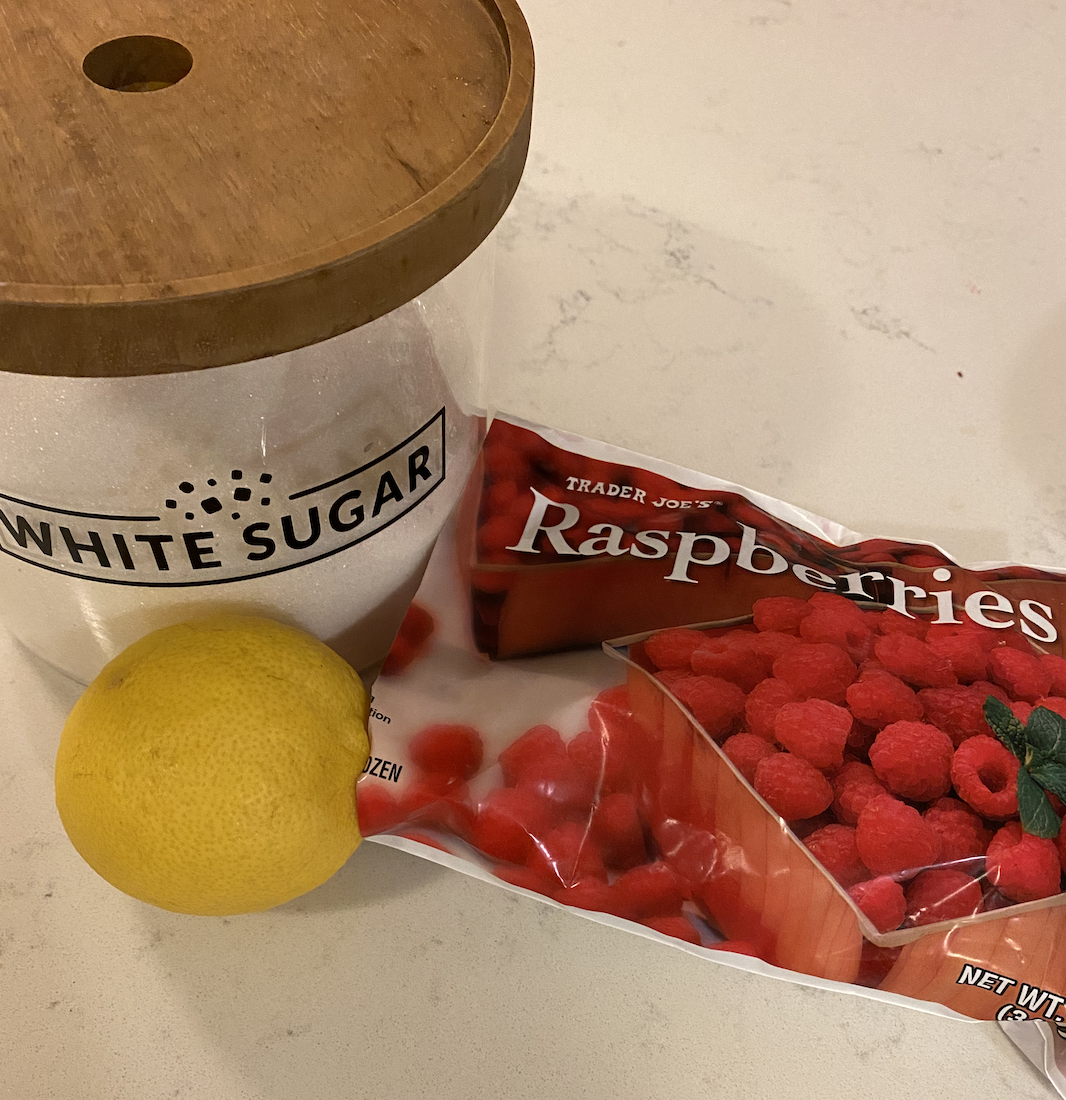
The first step to the entire cookie process was making the jam since it took some time to set. It’s a seemingly simple recipe – it only called for a bag of frozen raspberries, lemon juice, lemon zest and sugar. I don’t know if it’s something I’m missed when reading the recipe or maybe I didn’t follow the directions completely, but making the jam, took WAY longer than the recipe says.
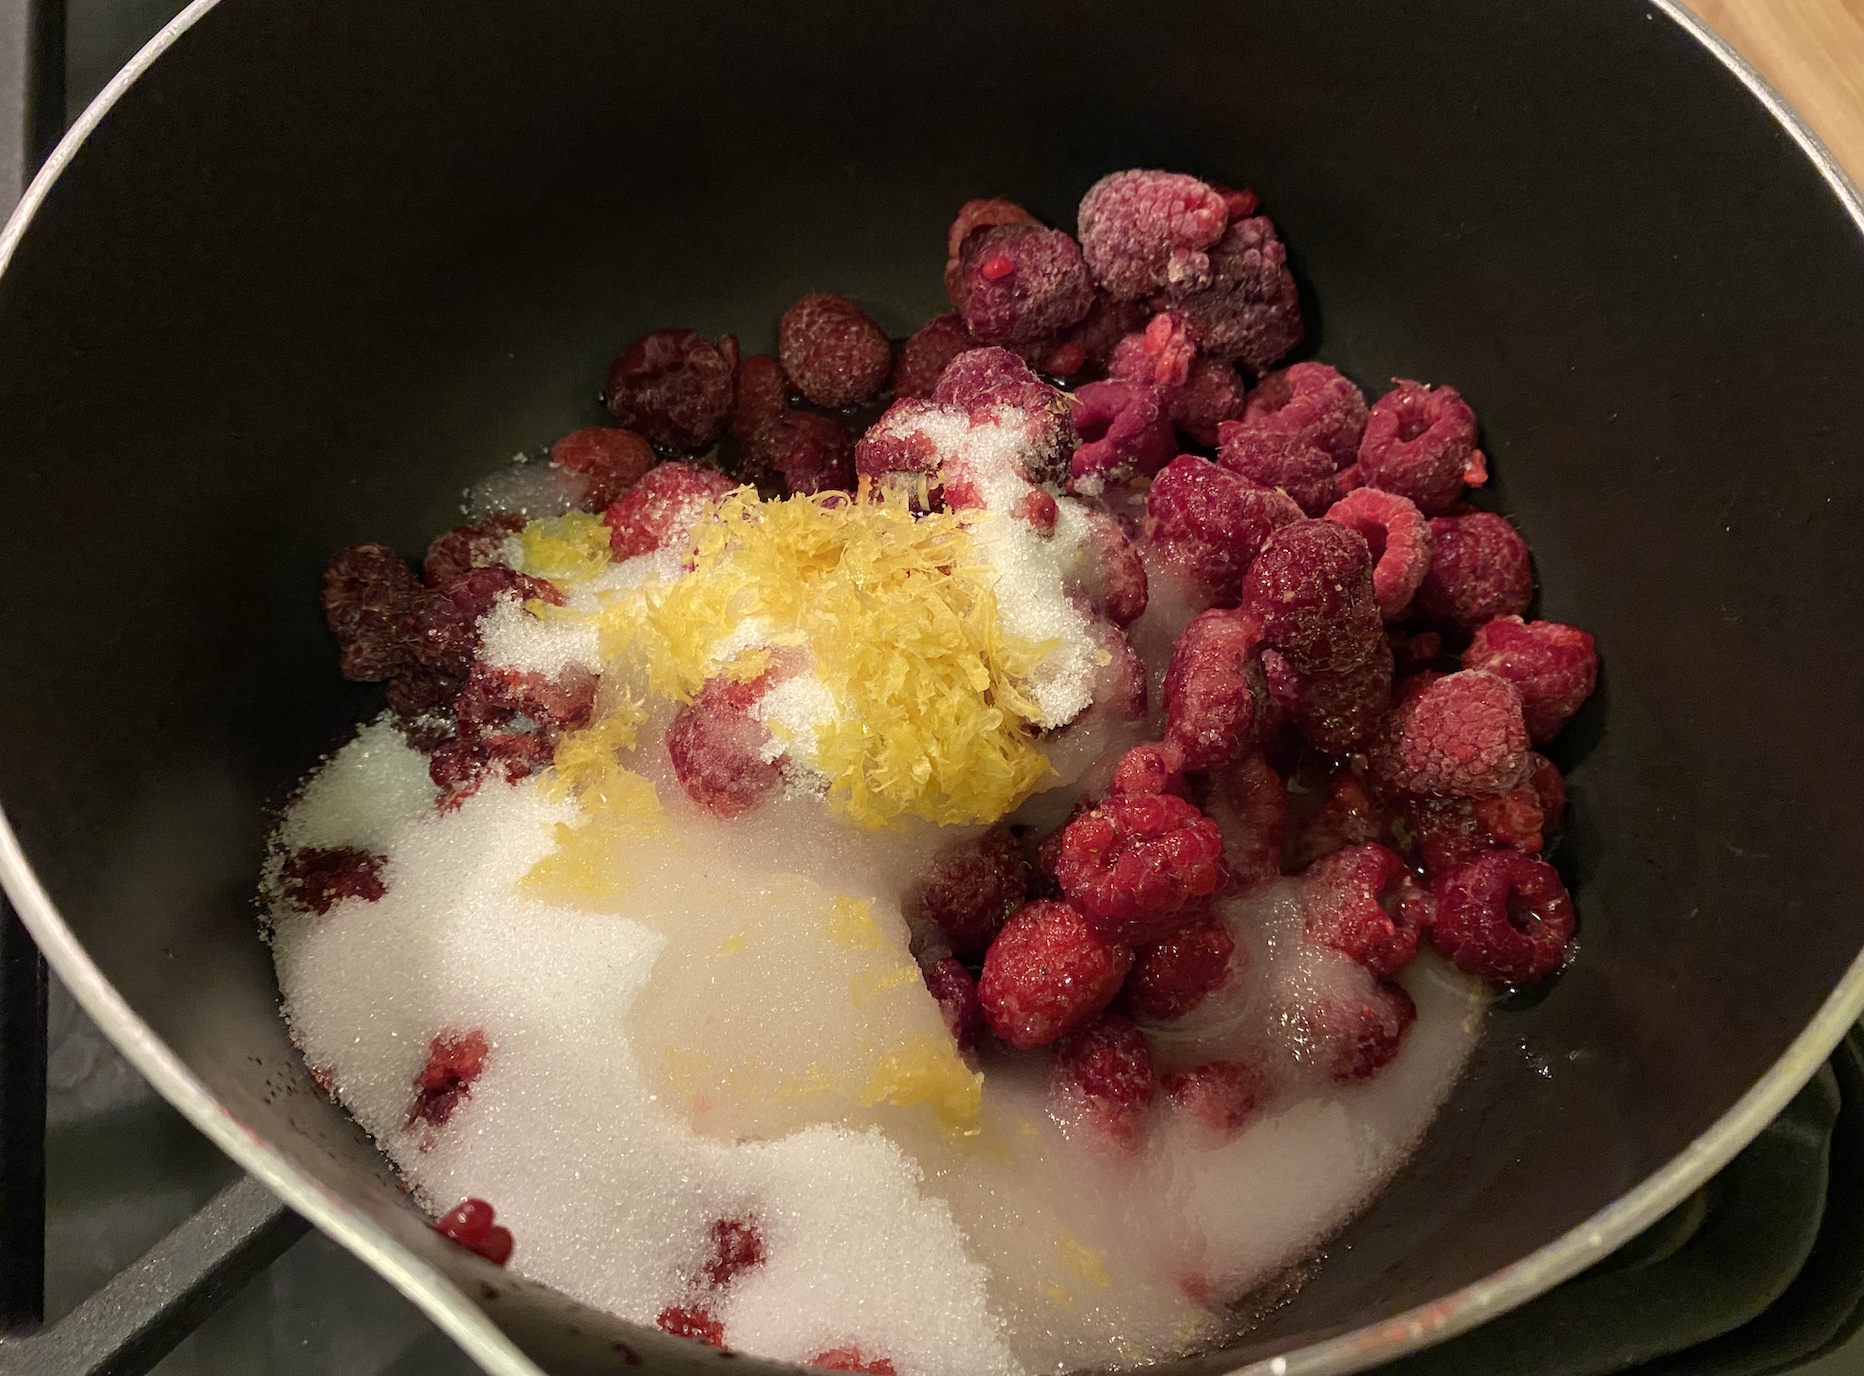
In a medium pot, I added all the ingredients over medium high heat and brought them to a boil while stirring occasionally. Once they reached a boil, I reduced the heat and let it thicken up. The recipe says it should take about 15-20 minutes, but mine took about double that length at around 40 minutes. I tested the jam several times by placing a plate in the freezer for about 10 minutes. Then, I took the plate out and placed a small spoonful onto the cold surface to see how the jam slides across it. If the jam moves quickly, the jam needs to stay on the stove longer, but if the jam moves slowly, then it should be ready for the next step. I also used my candy thermometer to see if I could tell if the jam was ready. For this method, the thermometer needs to read 220 degrees. When my jam was moving slowly across the plate, the thermometer also read 220 degrees, so I took it off the heat.
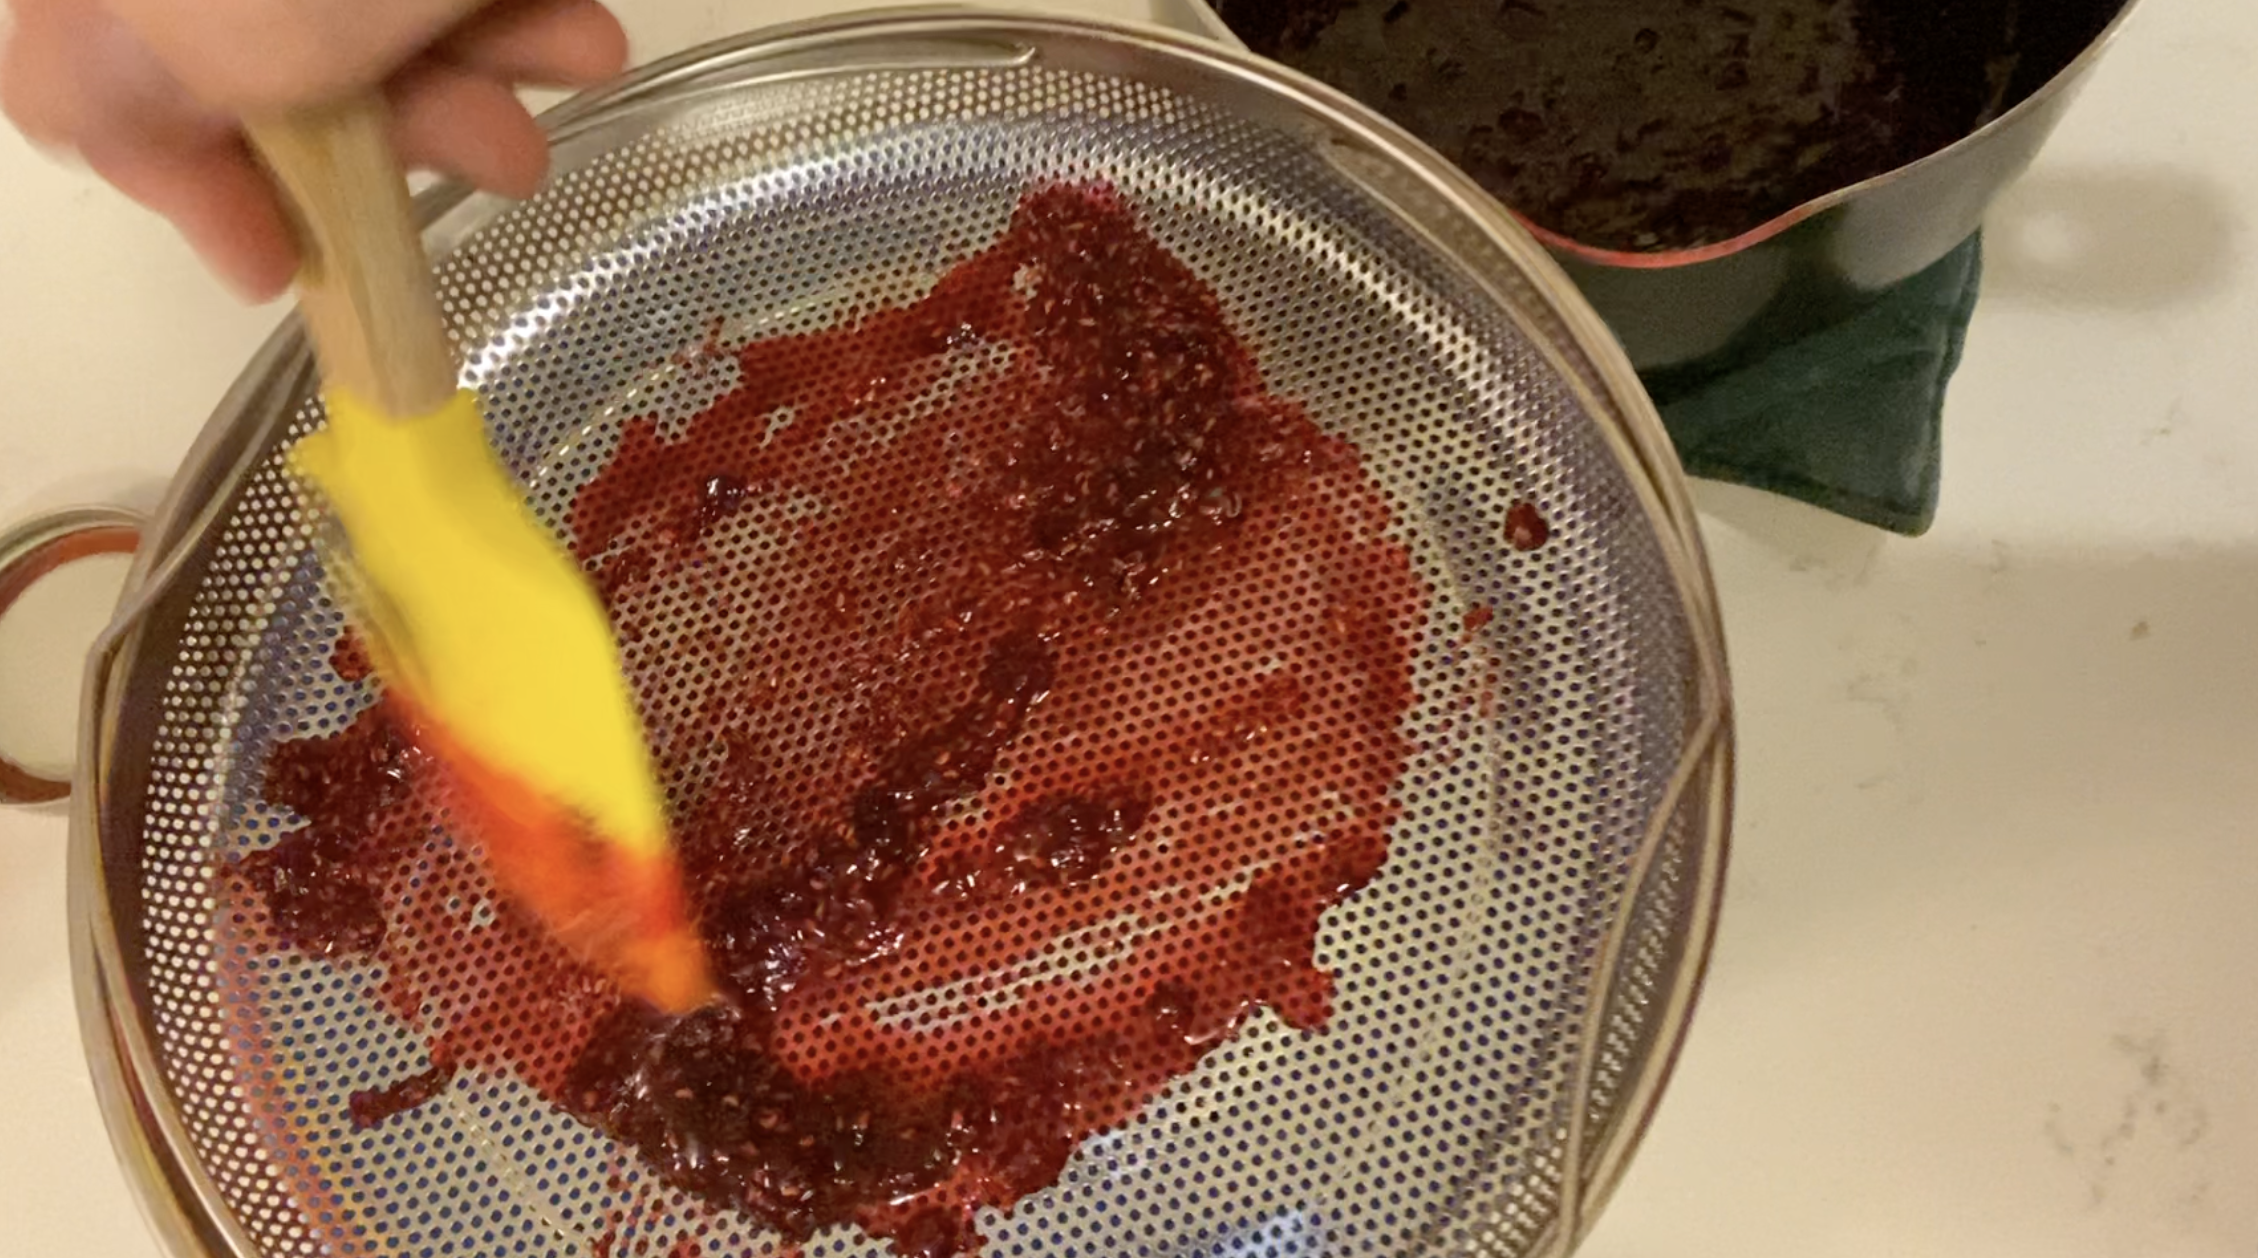
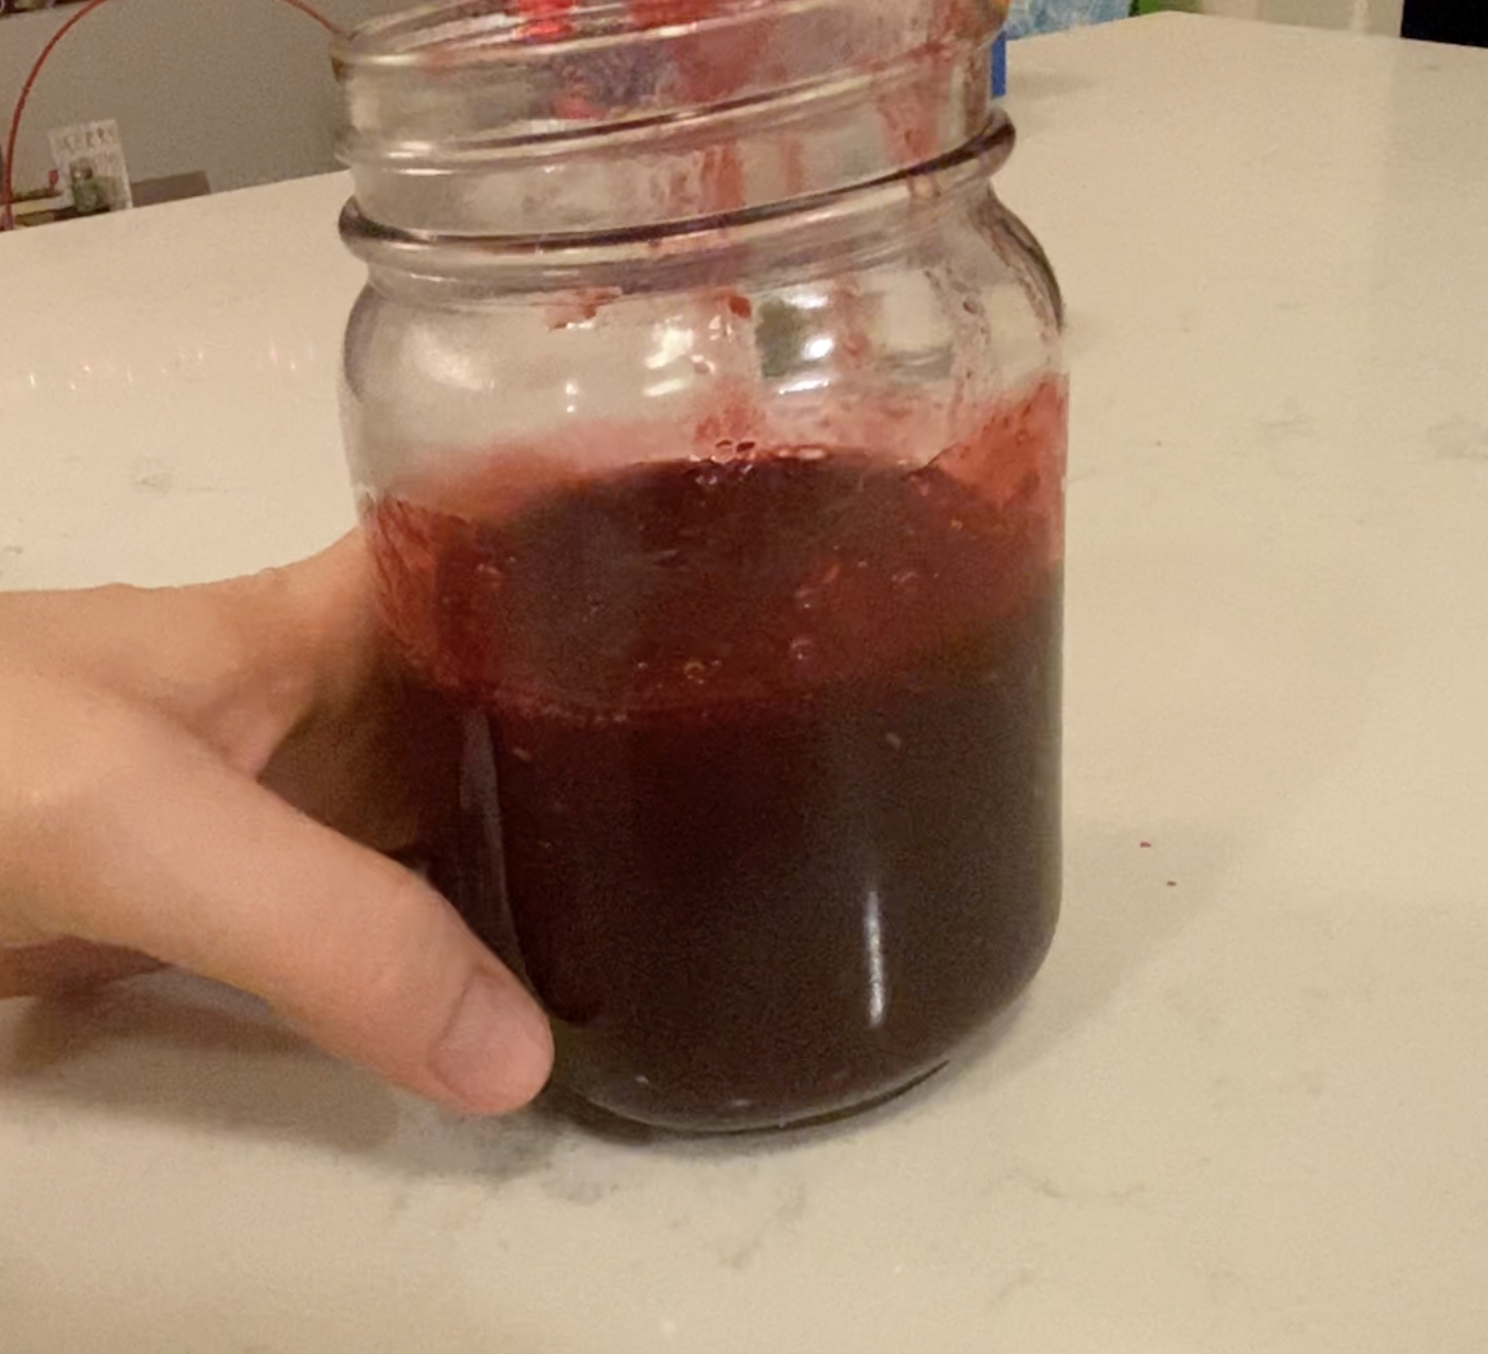
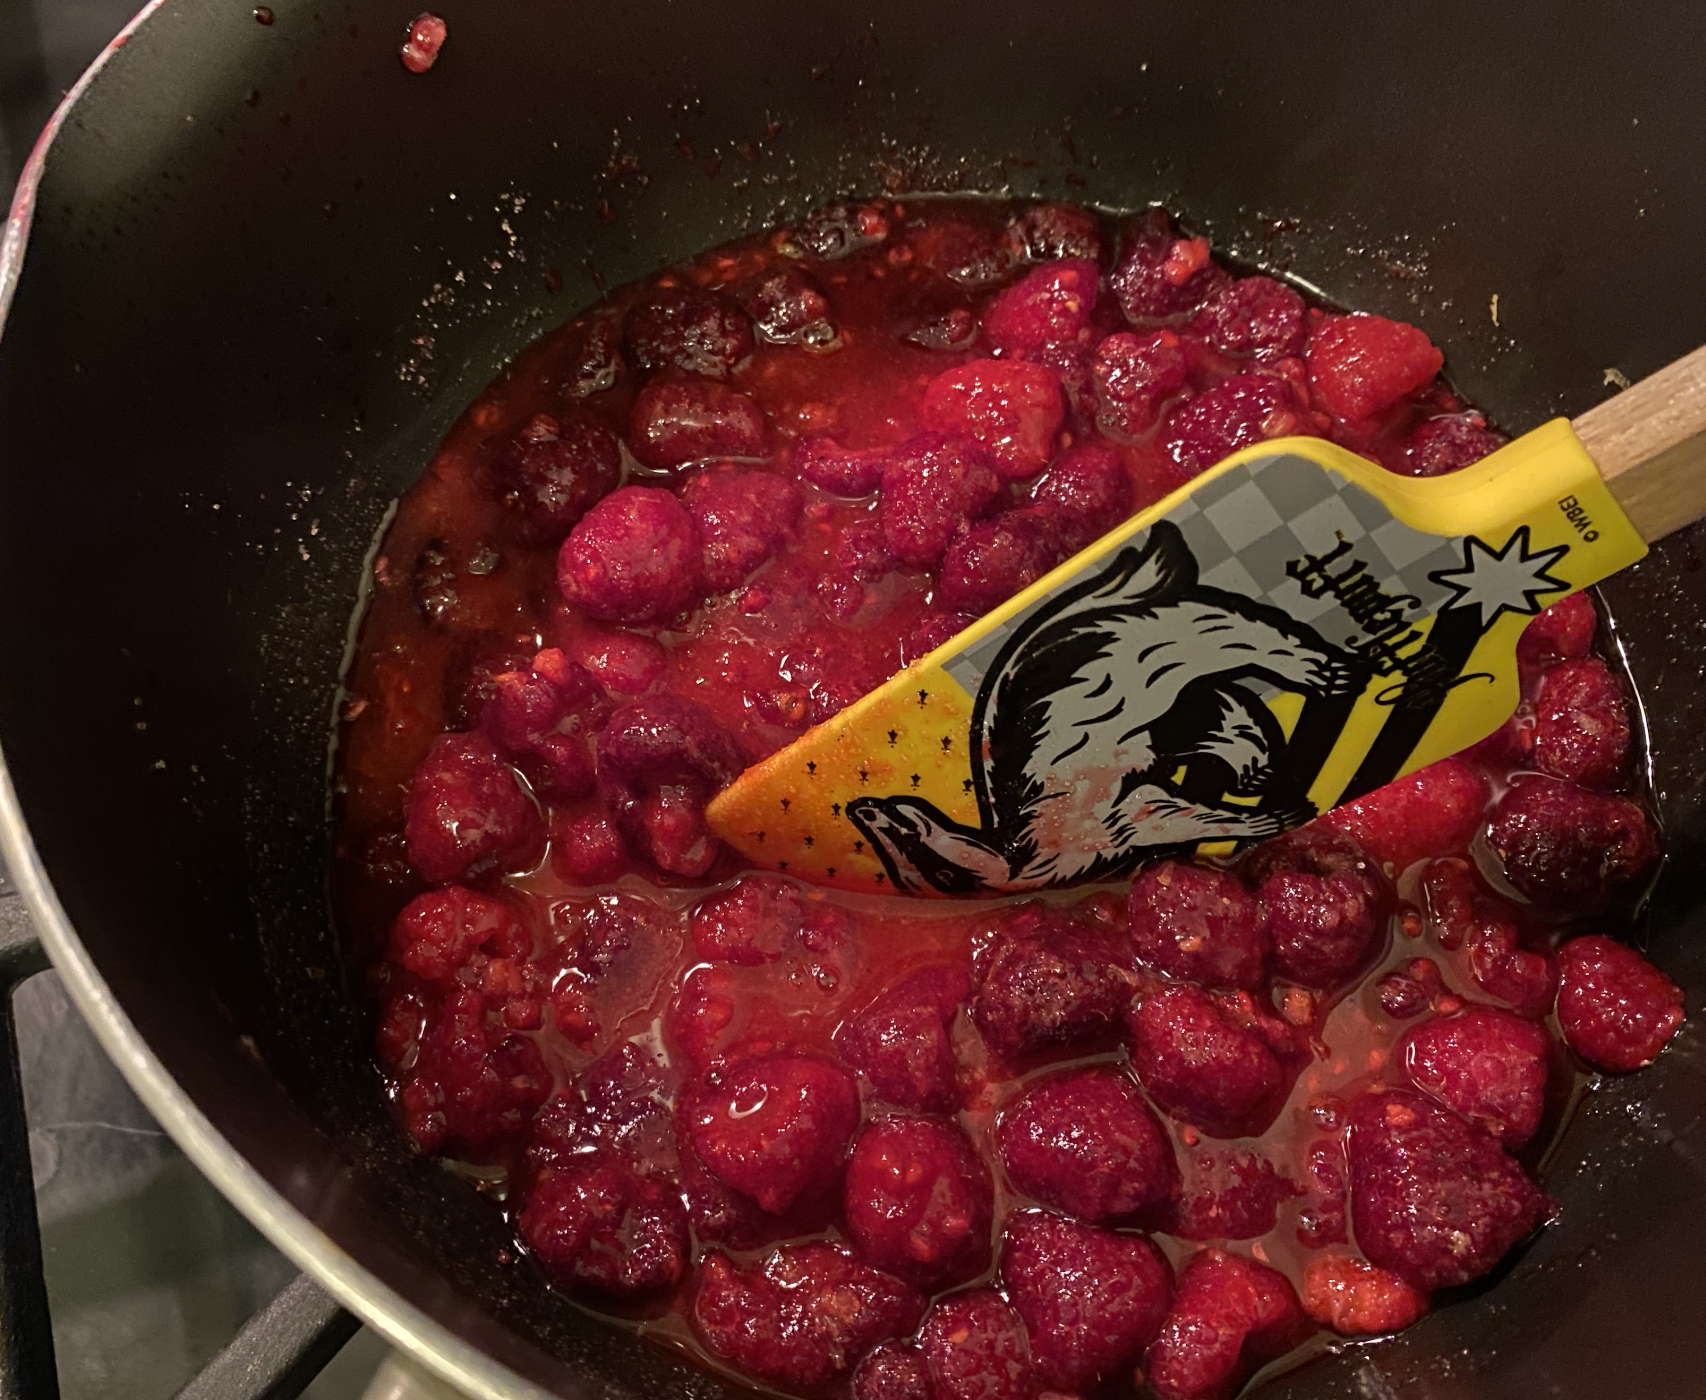
The next step was a messy one and took awhile – I wanted a smooth seedless jam so I pressed the jam through my metal sifter and then when that took too long, I used my metal steaming tray from my Our Place pan and that worked great. Once all the jam was pressed through the sieve and into a glass jar, I let it cool on the counter before placing it in the refrigerator over night.
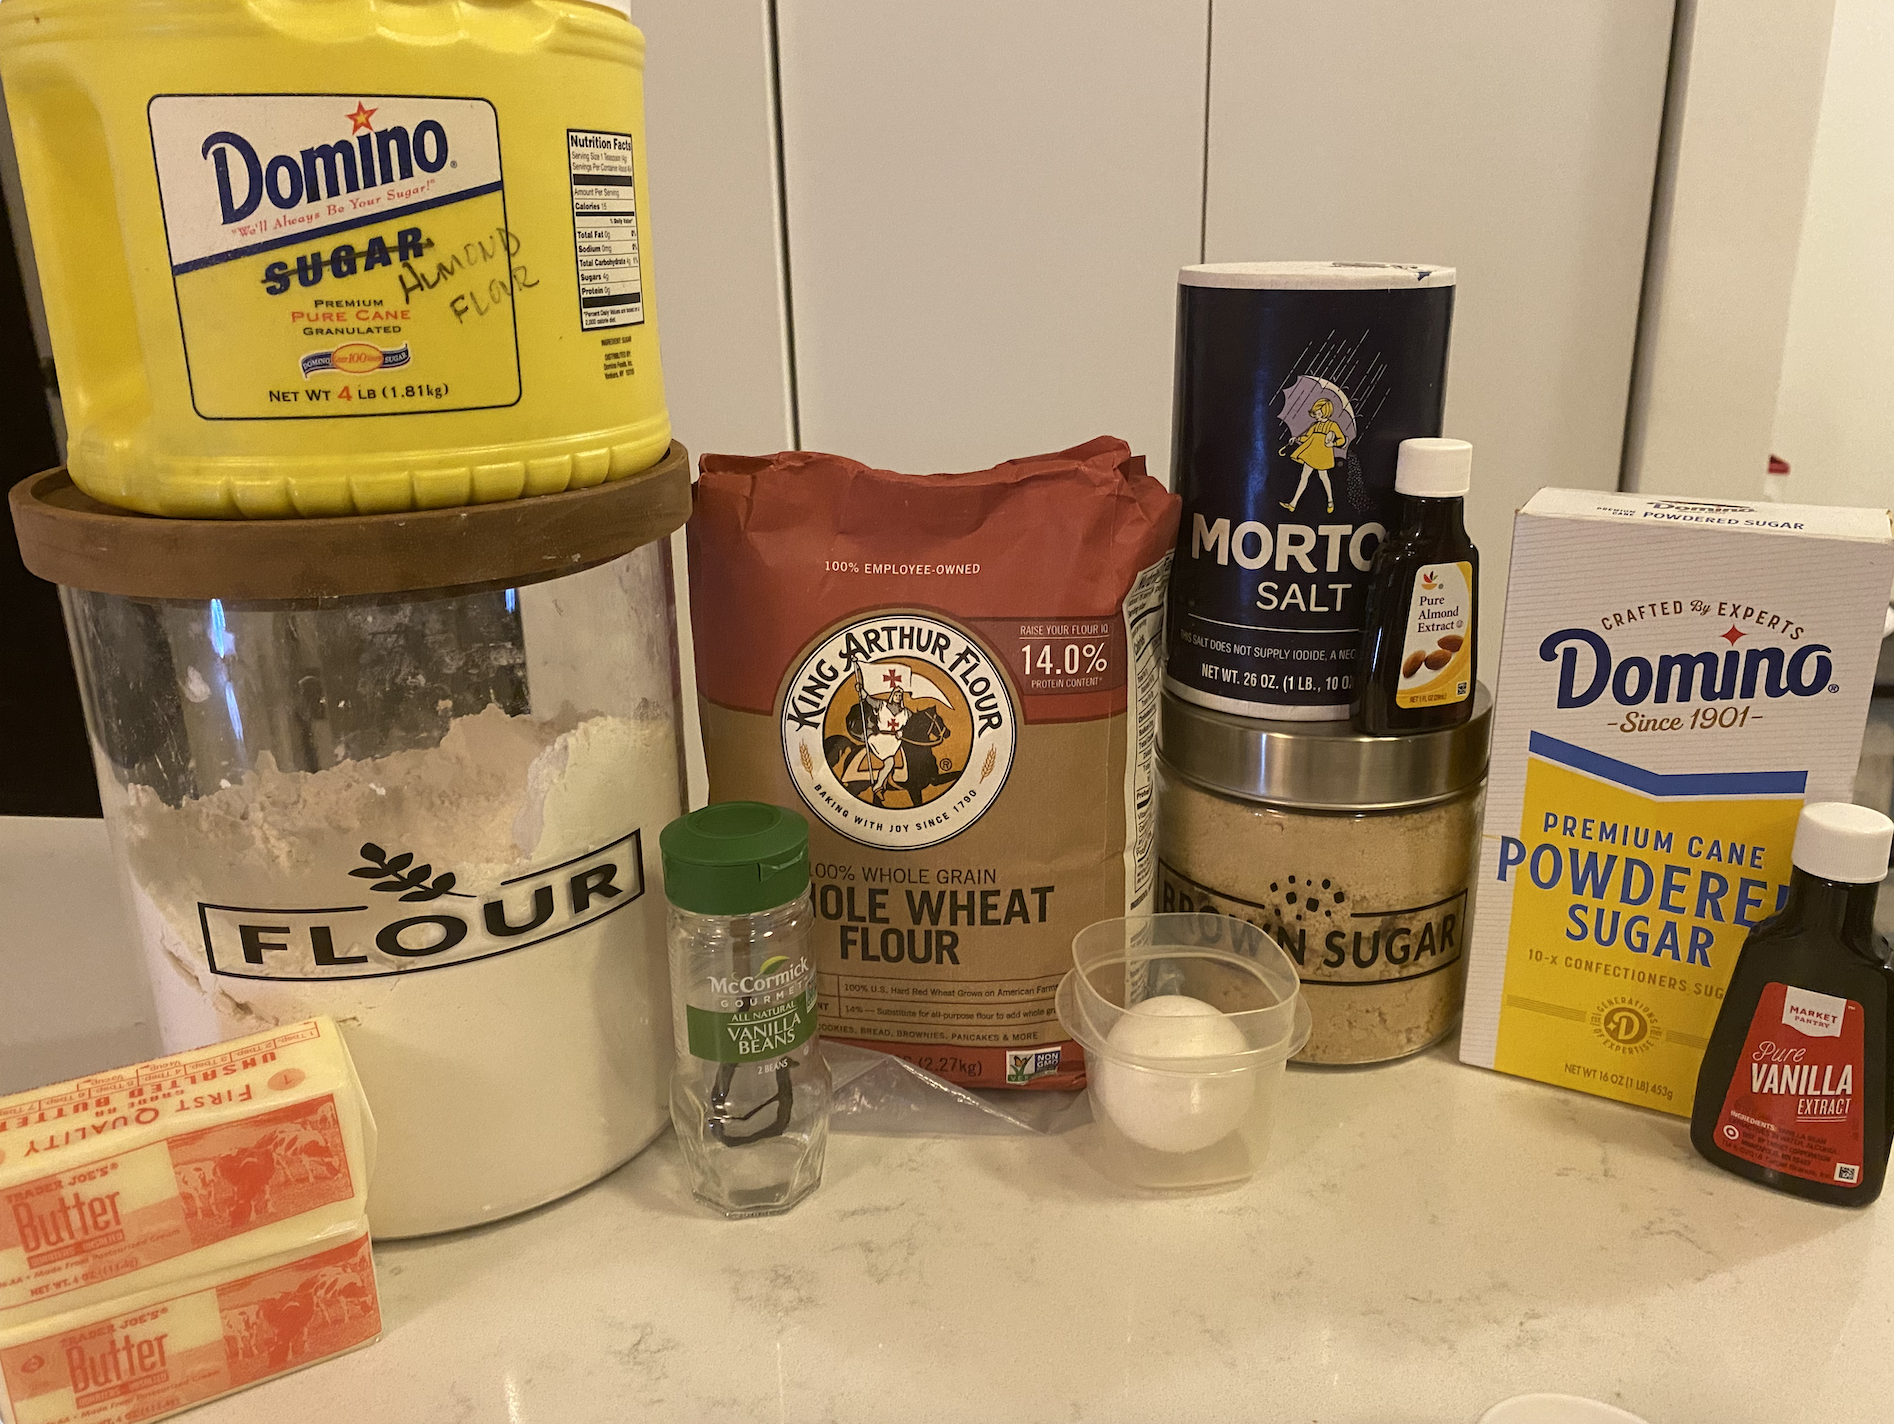
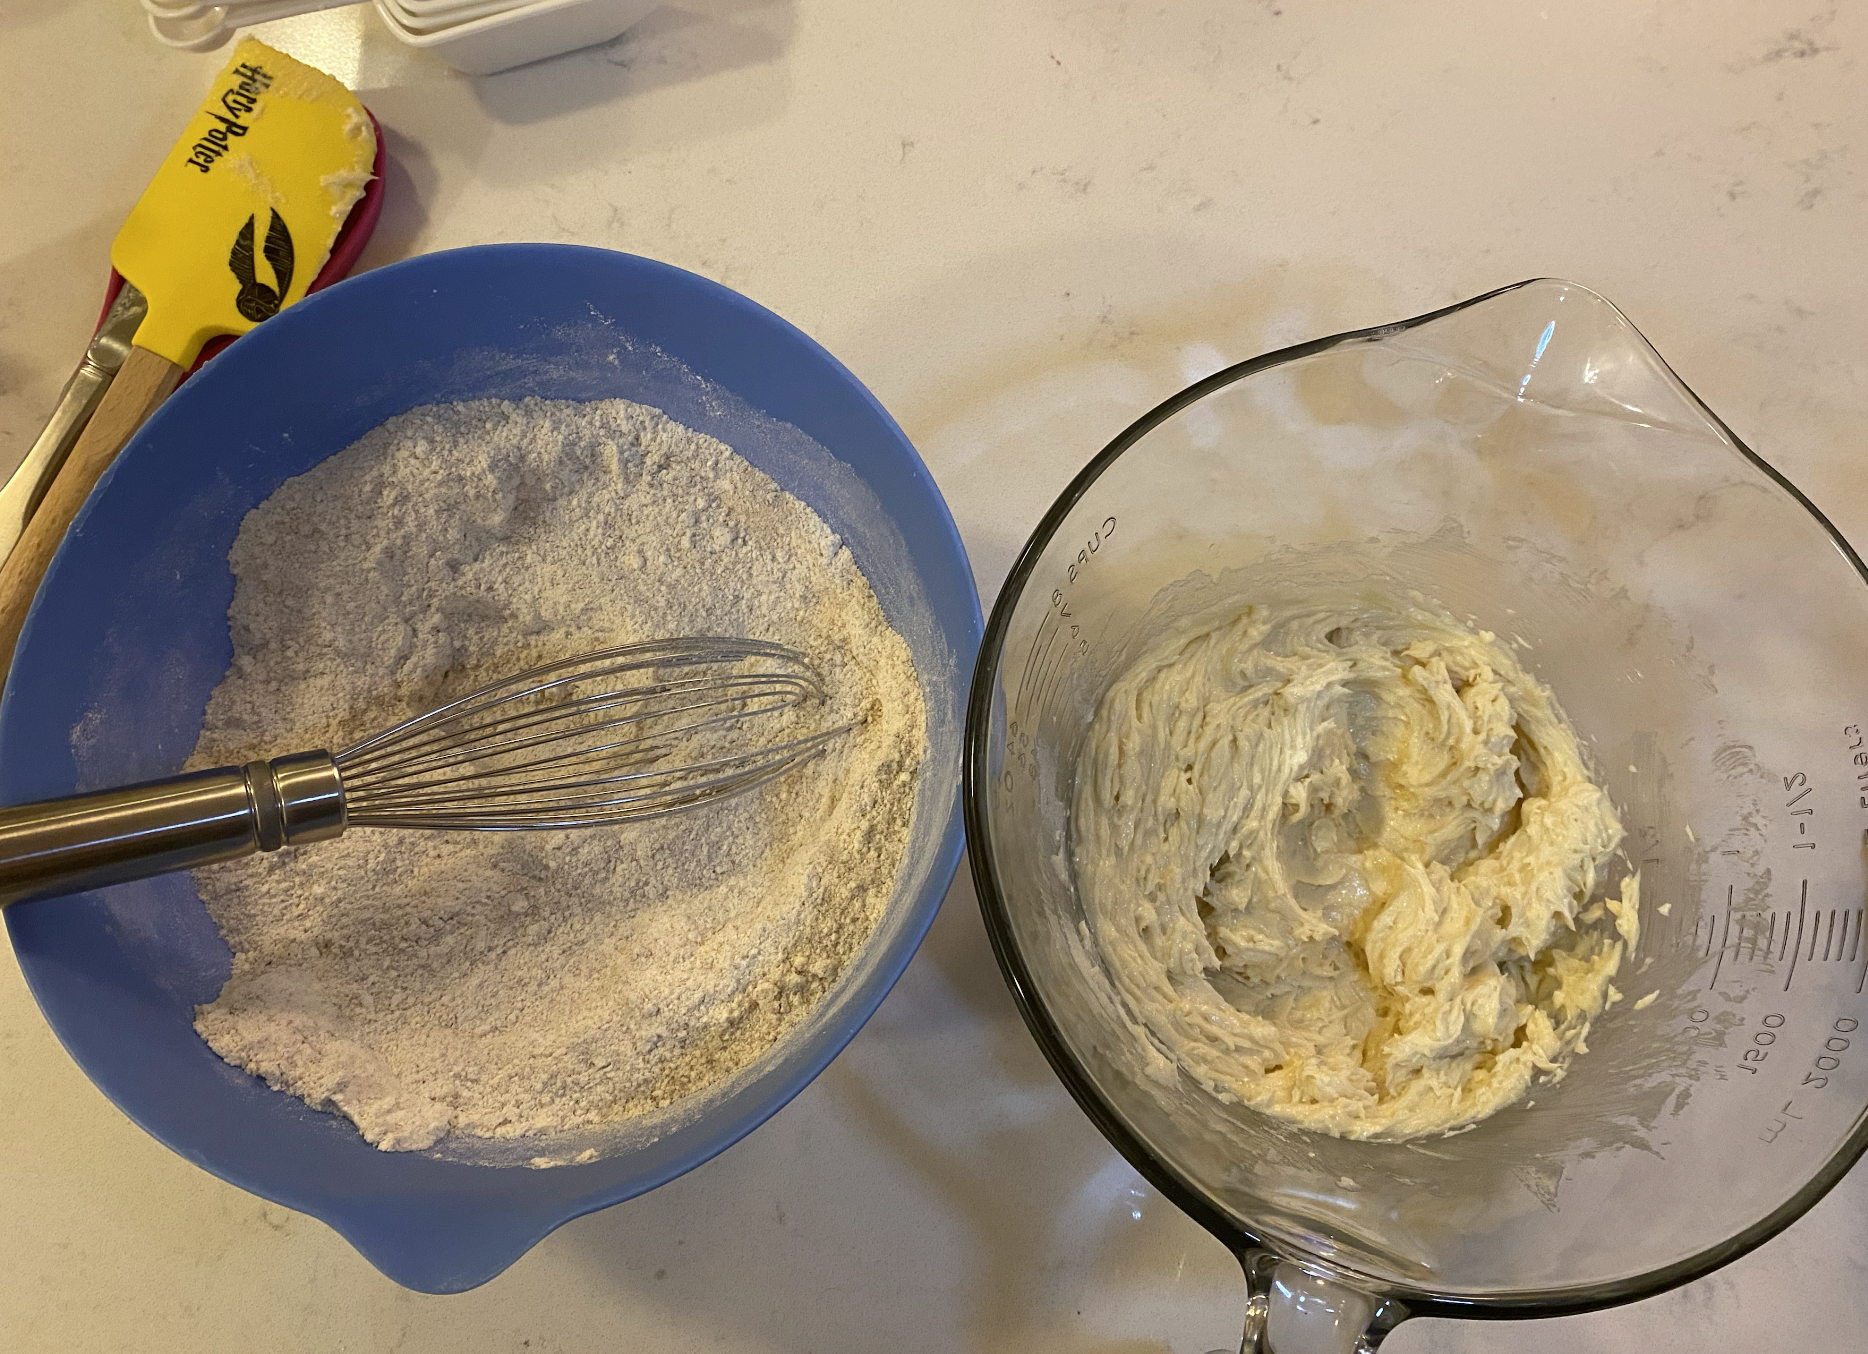
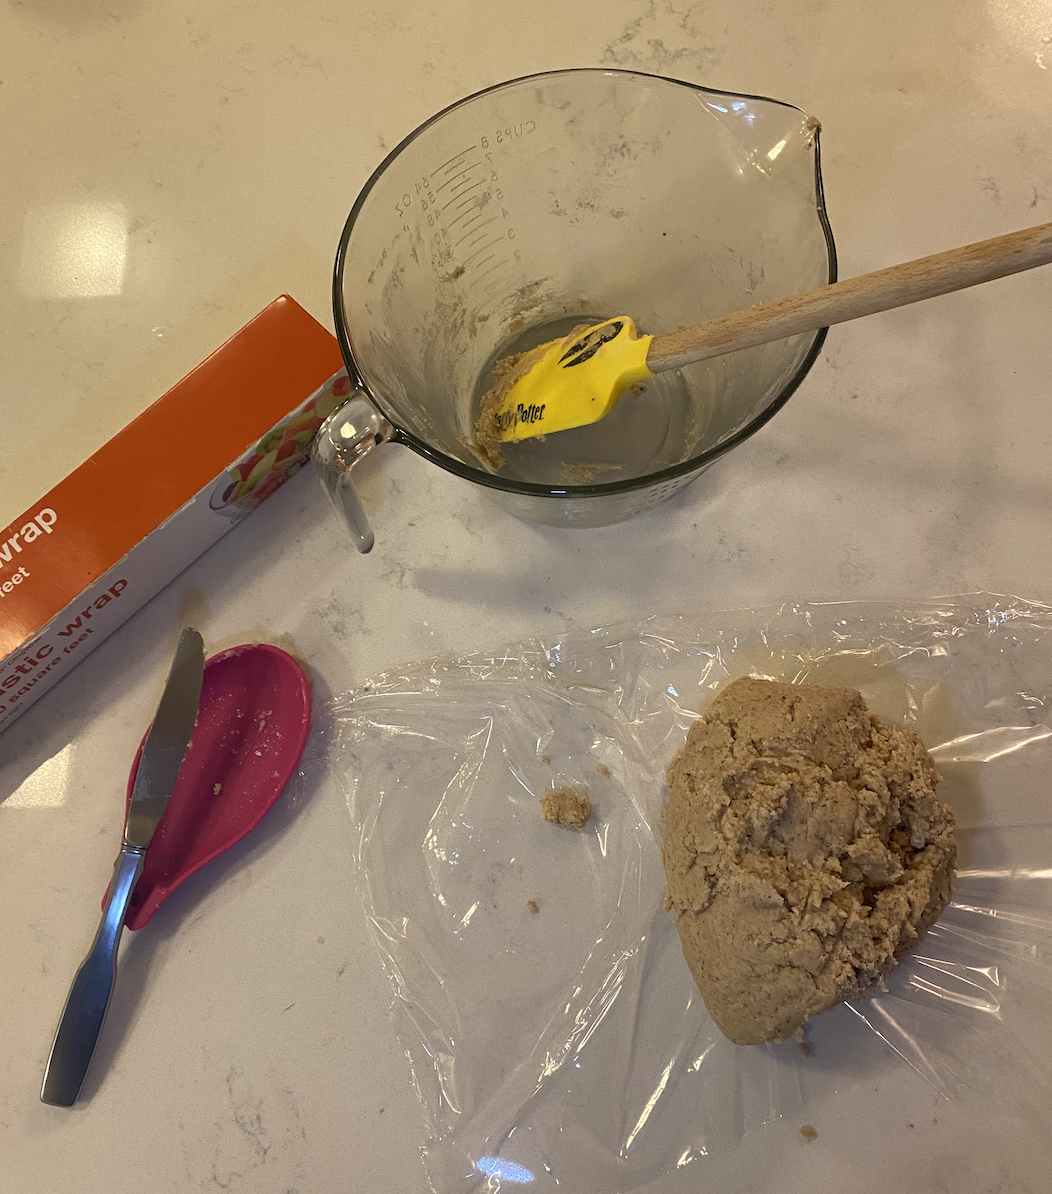
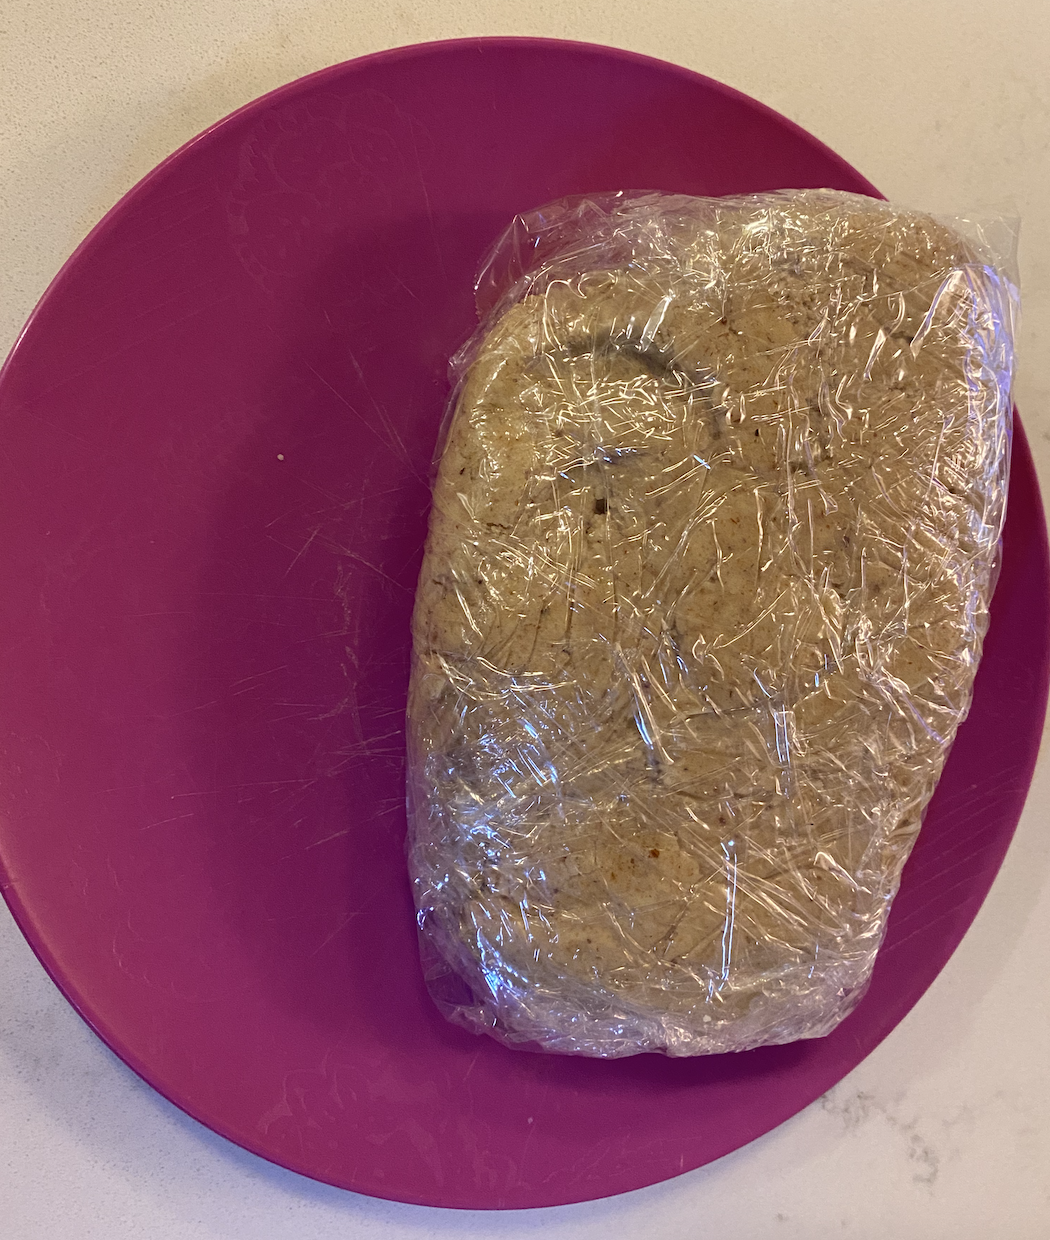
To make the cookies, the first step was to combine all of the dry ingredients, which were salt, regular all purpose flour, almond flour, and whole wheat flour into one bowl. In another bowl, I added the cup of butter and half of a cup of brown sugar and mixed those together until they were smooth. Then, an egg, a teaspoon of vanilla extract, and a teaspoon of almond extract were added into the mixture. Once the wet ingredients were together, I slowly added the bowl of dry ingredients until everything was thoroughly combined. I dumped the mixture onto a sheet of plastic wrap to create a disc shape and then placed it into the refrigerator to chill for a few hours.
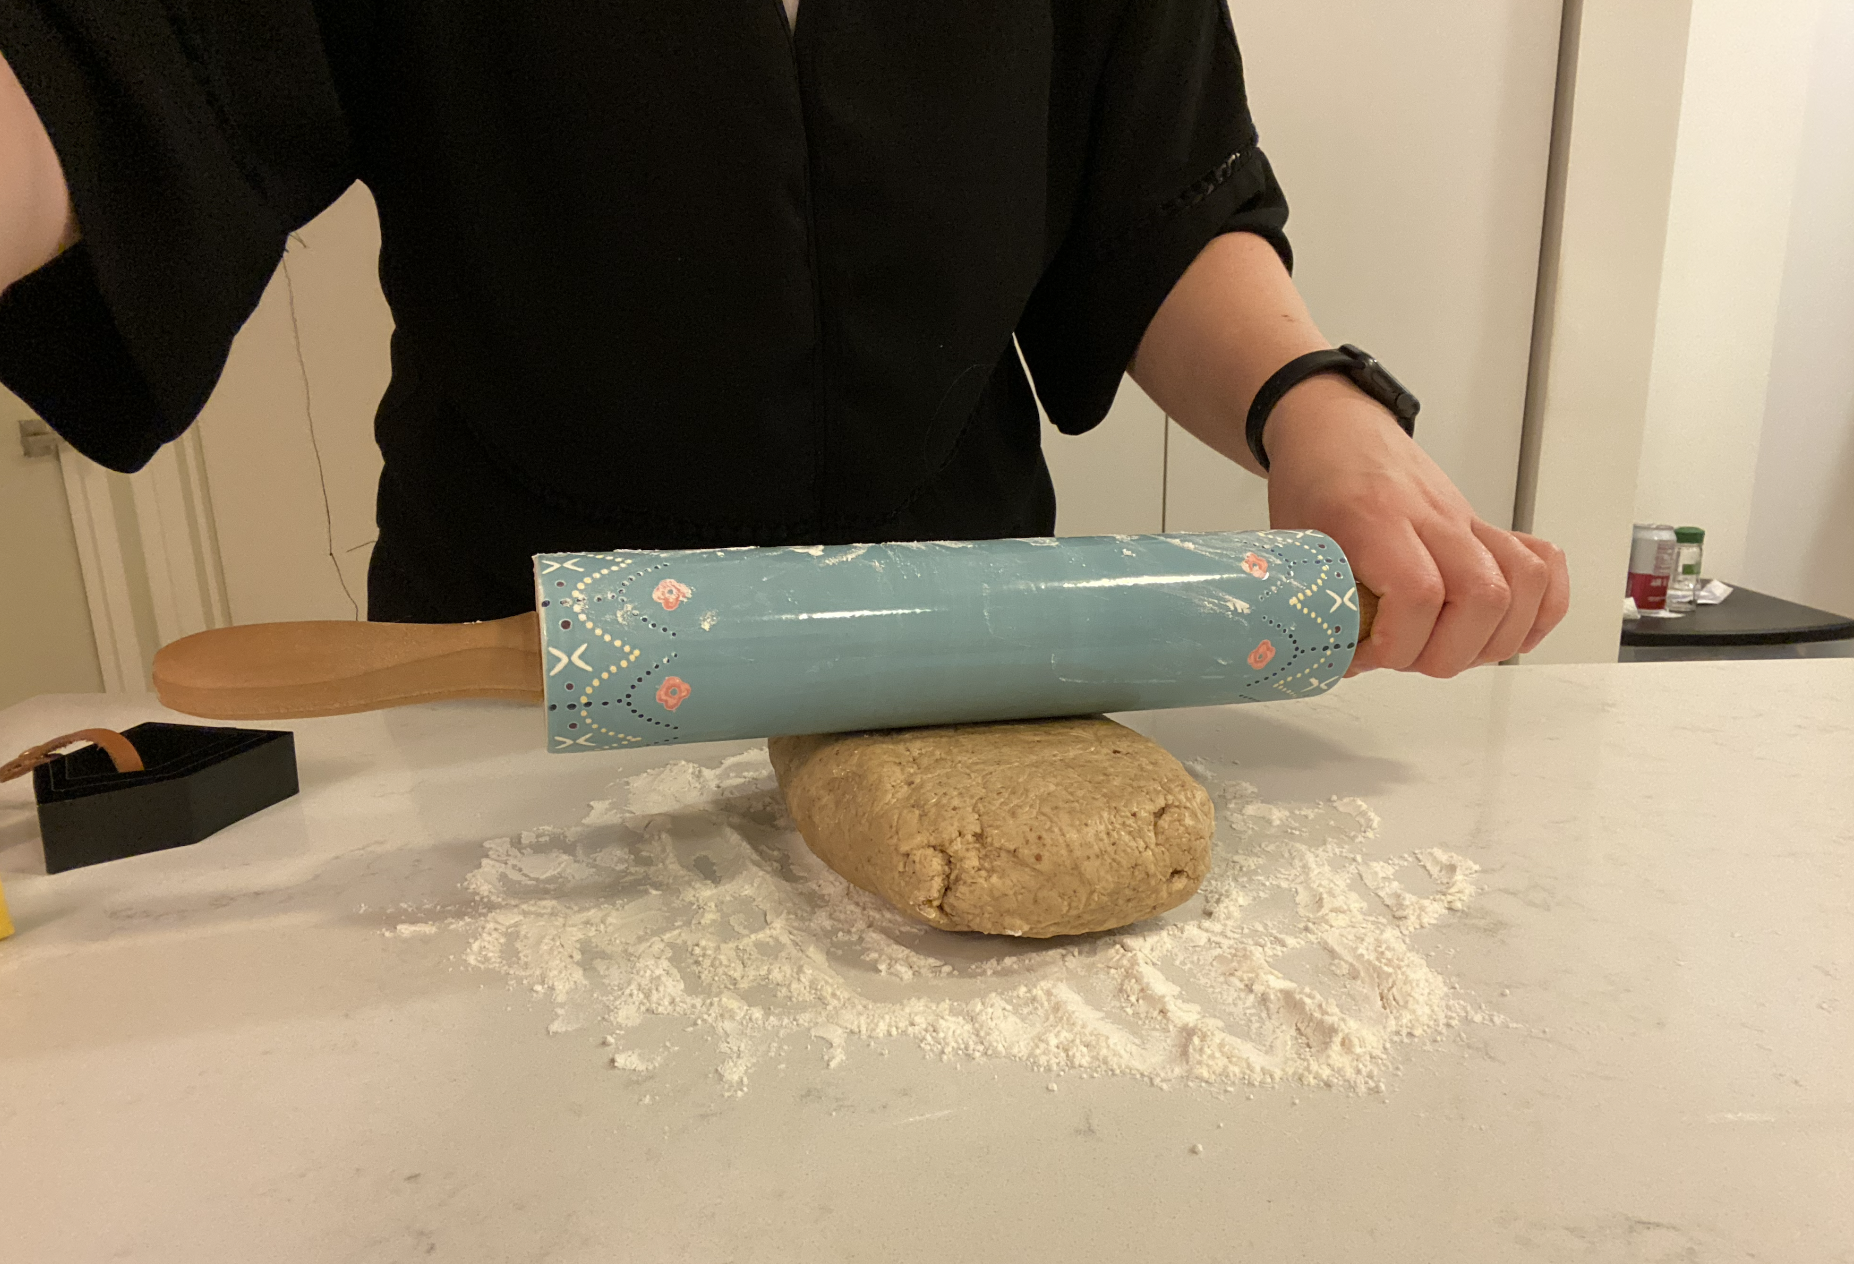
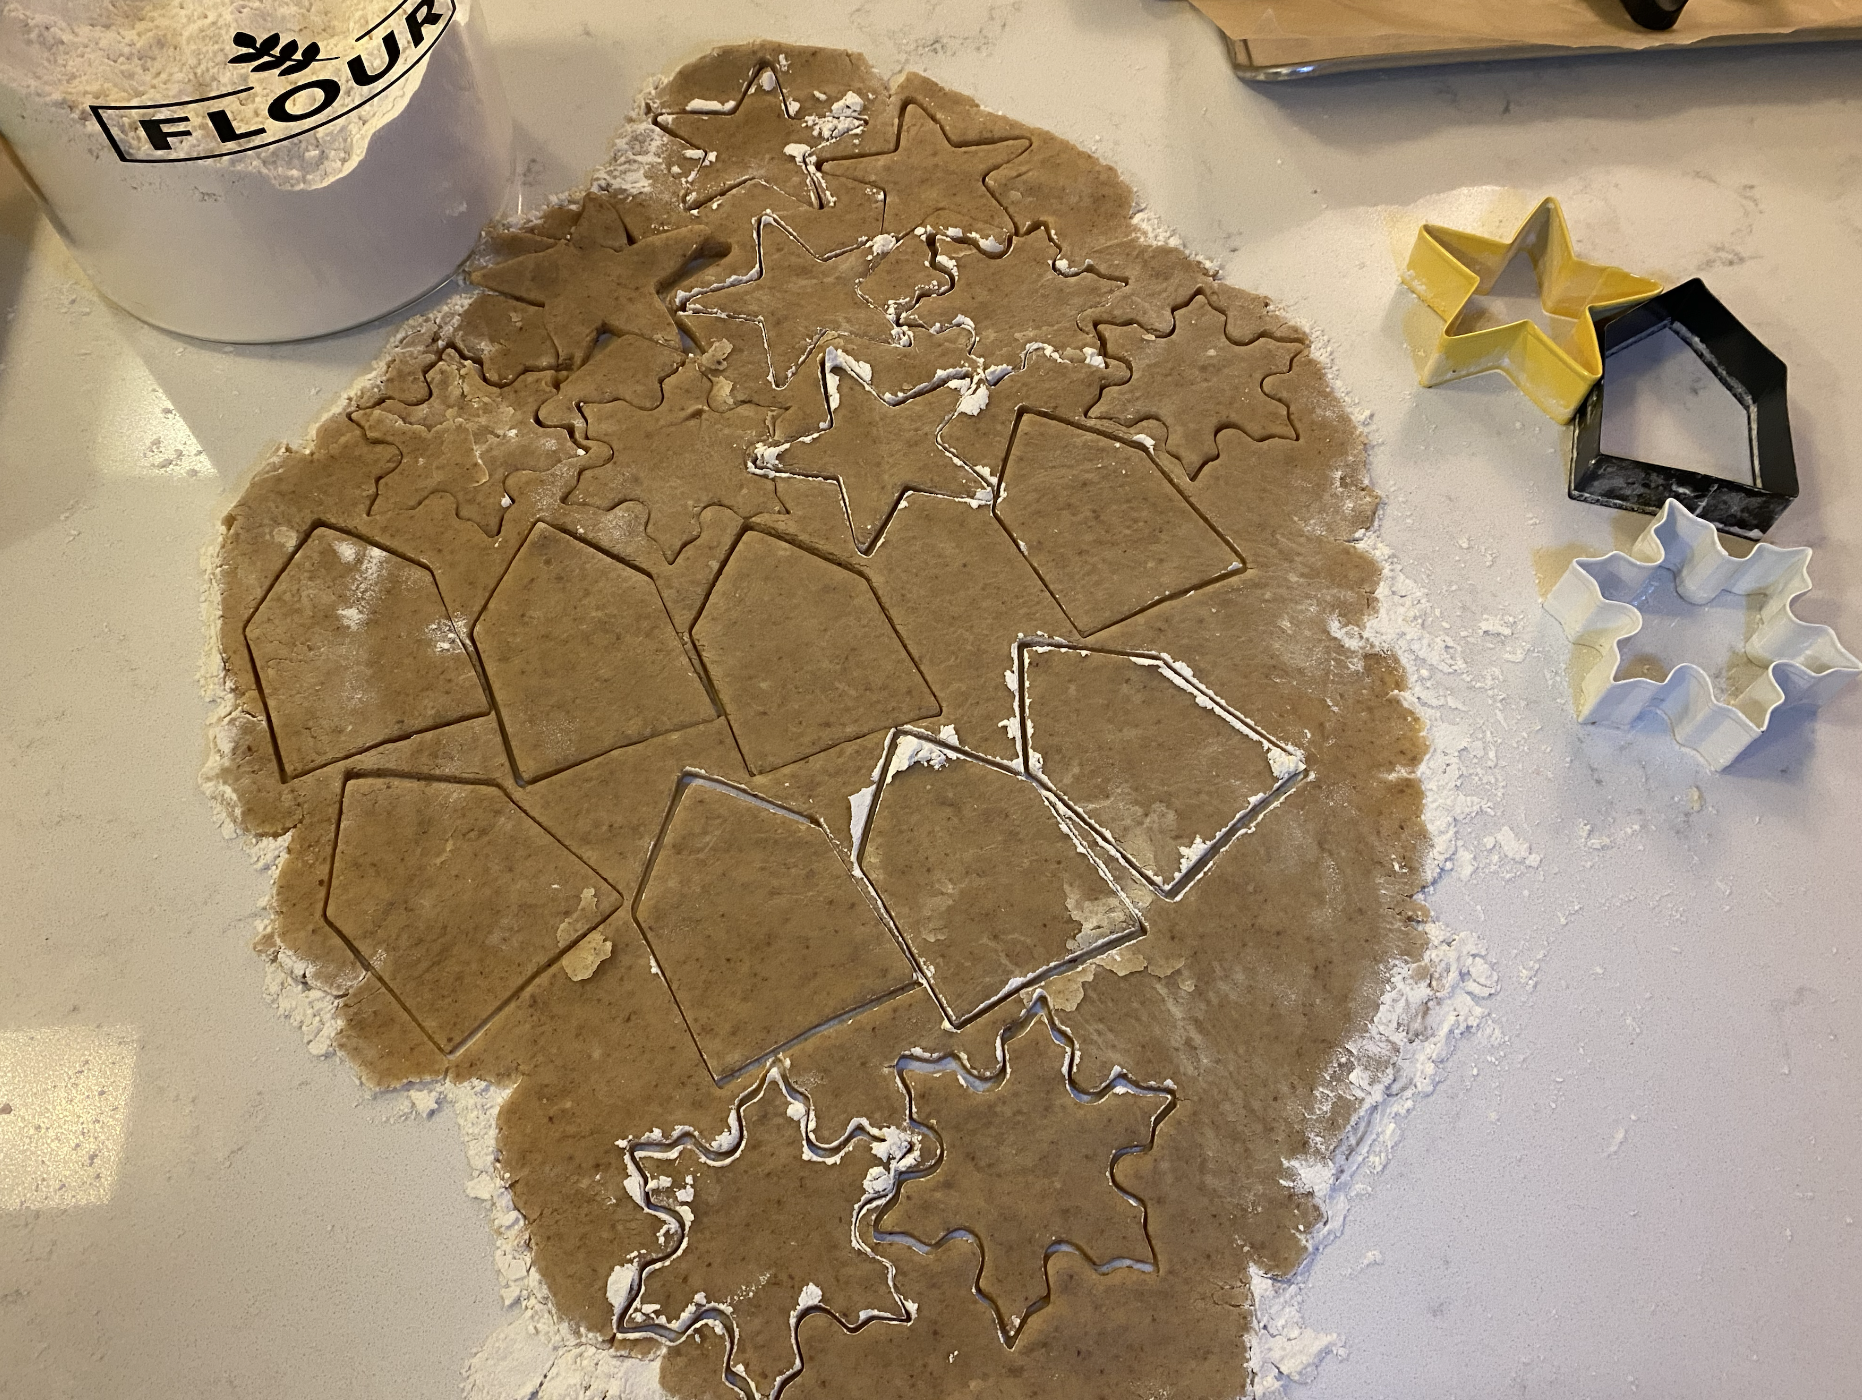
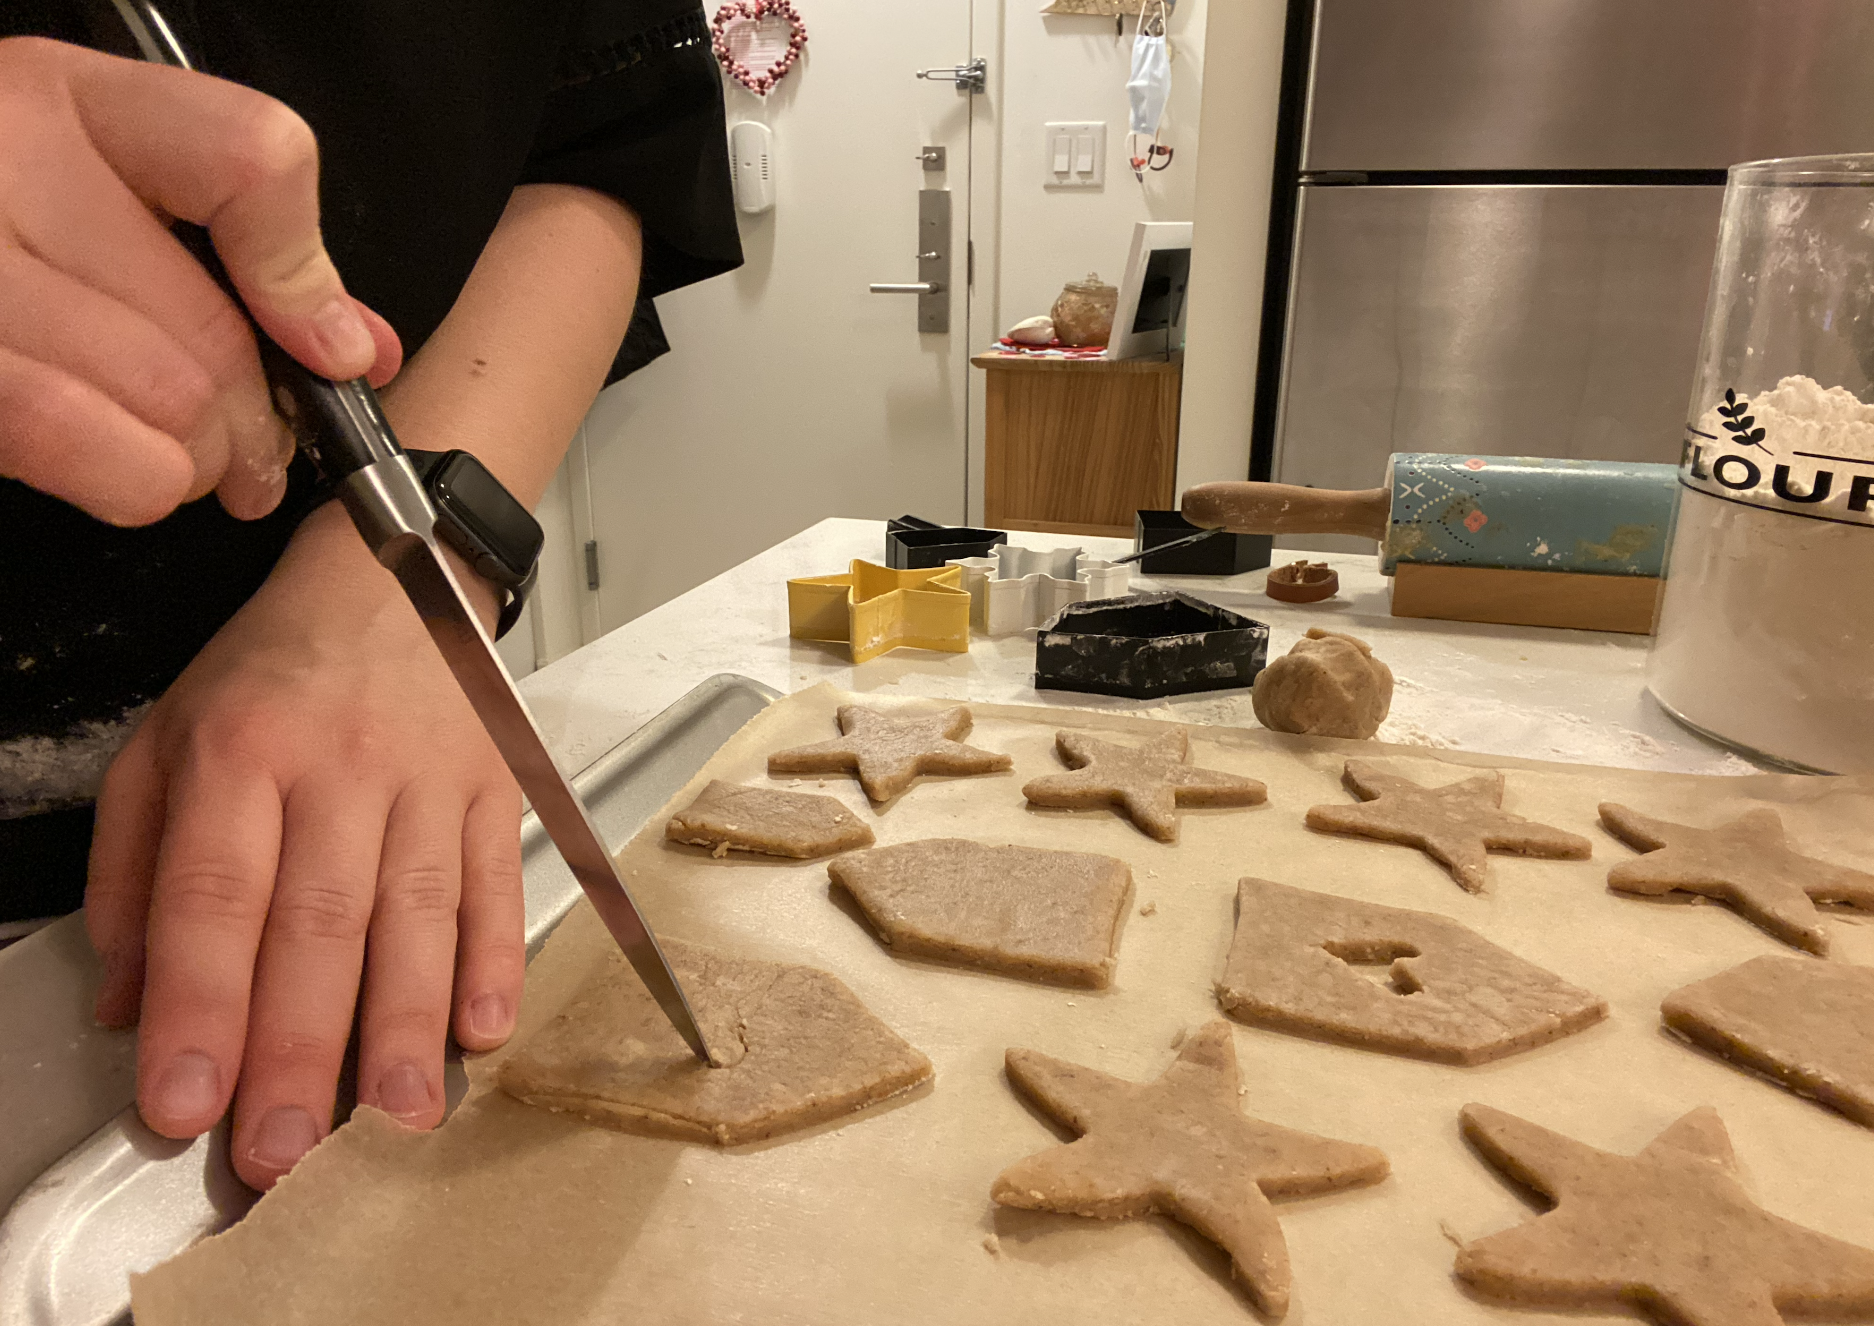
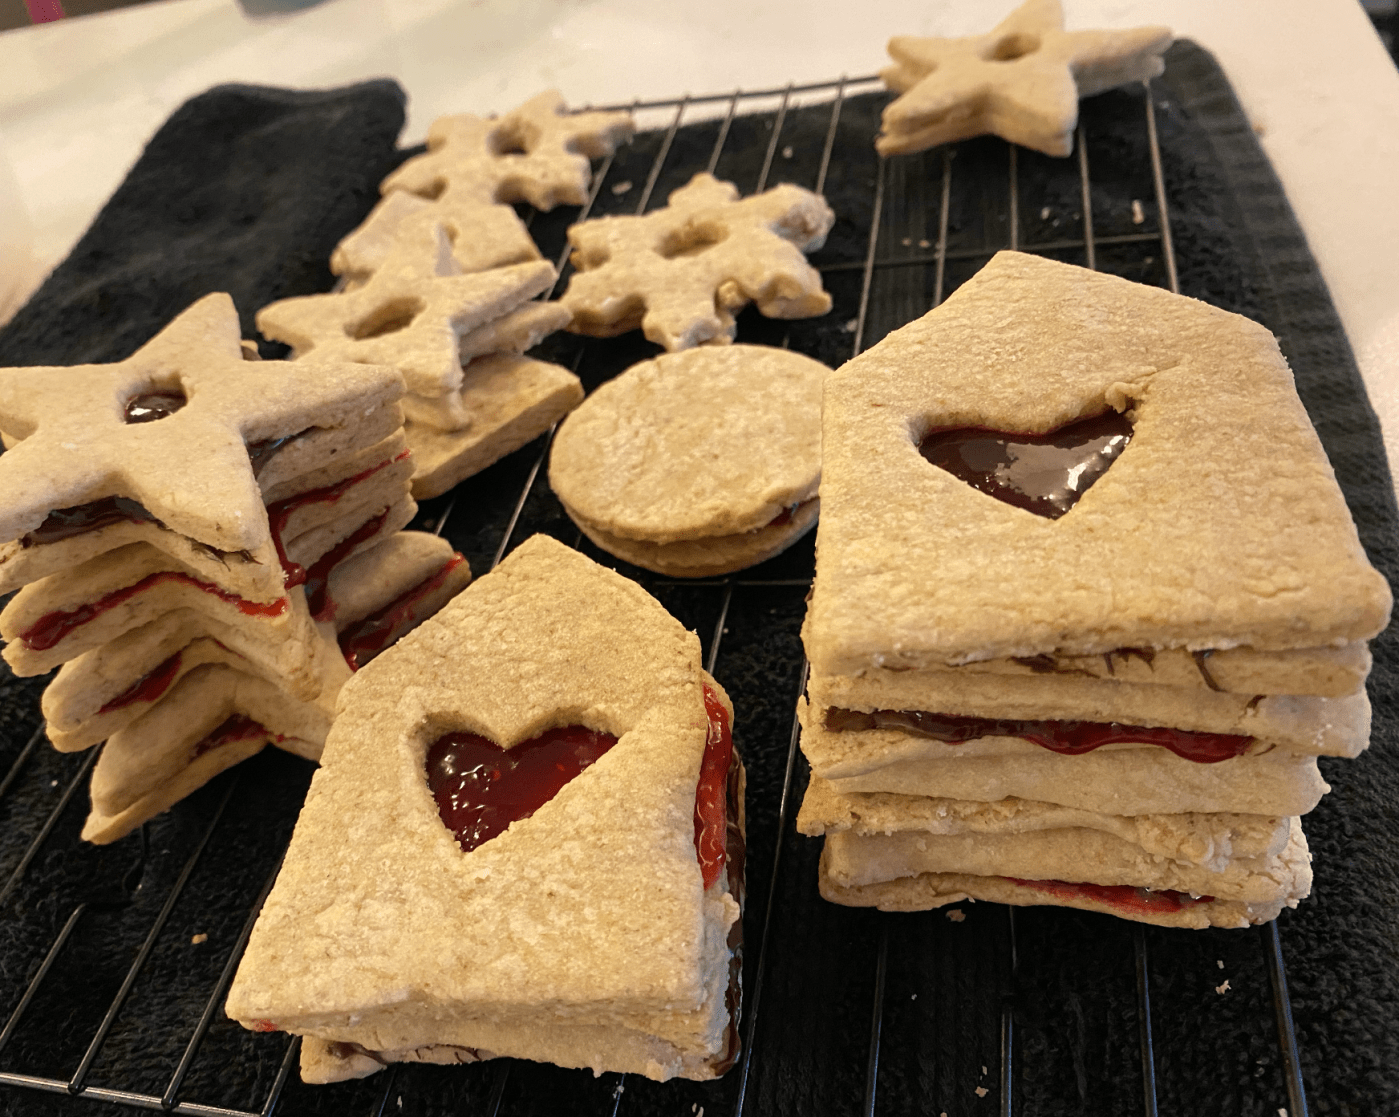
Later that day, I rolled out the dough onto my kitchen counter that I dusted with flour. I used snowflake, star, and house shaped cookie cutters and in half of the cutouts, I used a knife to scrape out a heart or a circle from the middle. They were placed onto parchment lined cookie sheets and baked in the oven at 350 (I actually had to make an educated guess about the temperature because the recipe skipped that detail) for about 8-11 minutes.

Once they were a nice golden brown, I laid them out onto a baking rack to cool completely. I didn’t want the heat from the cookies making a bigger mess by causing the jam to get runny.
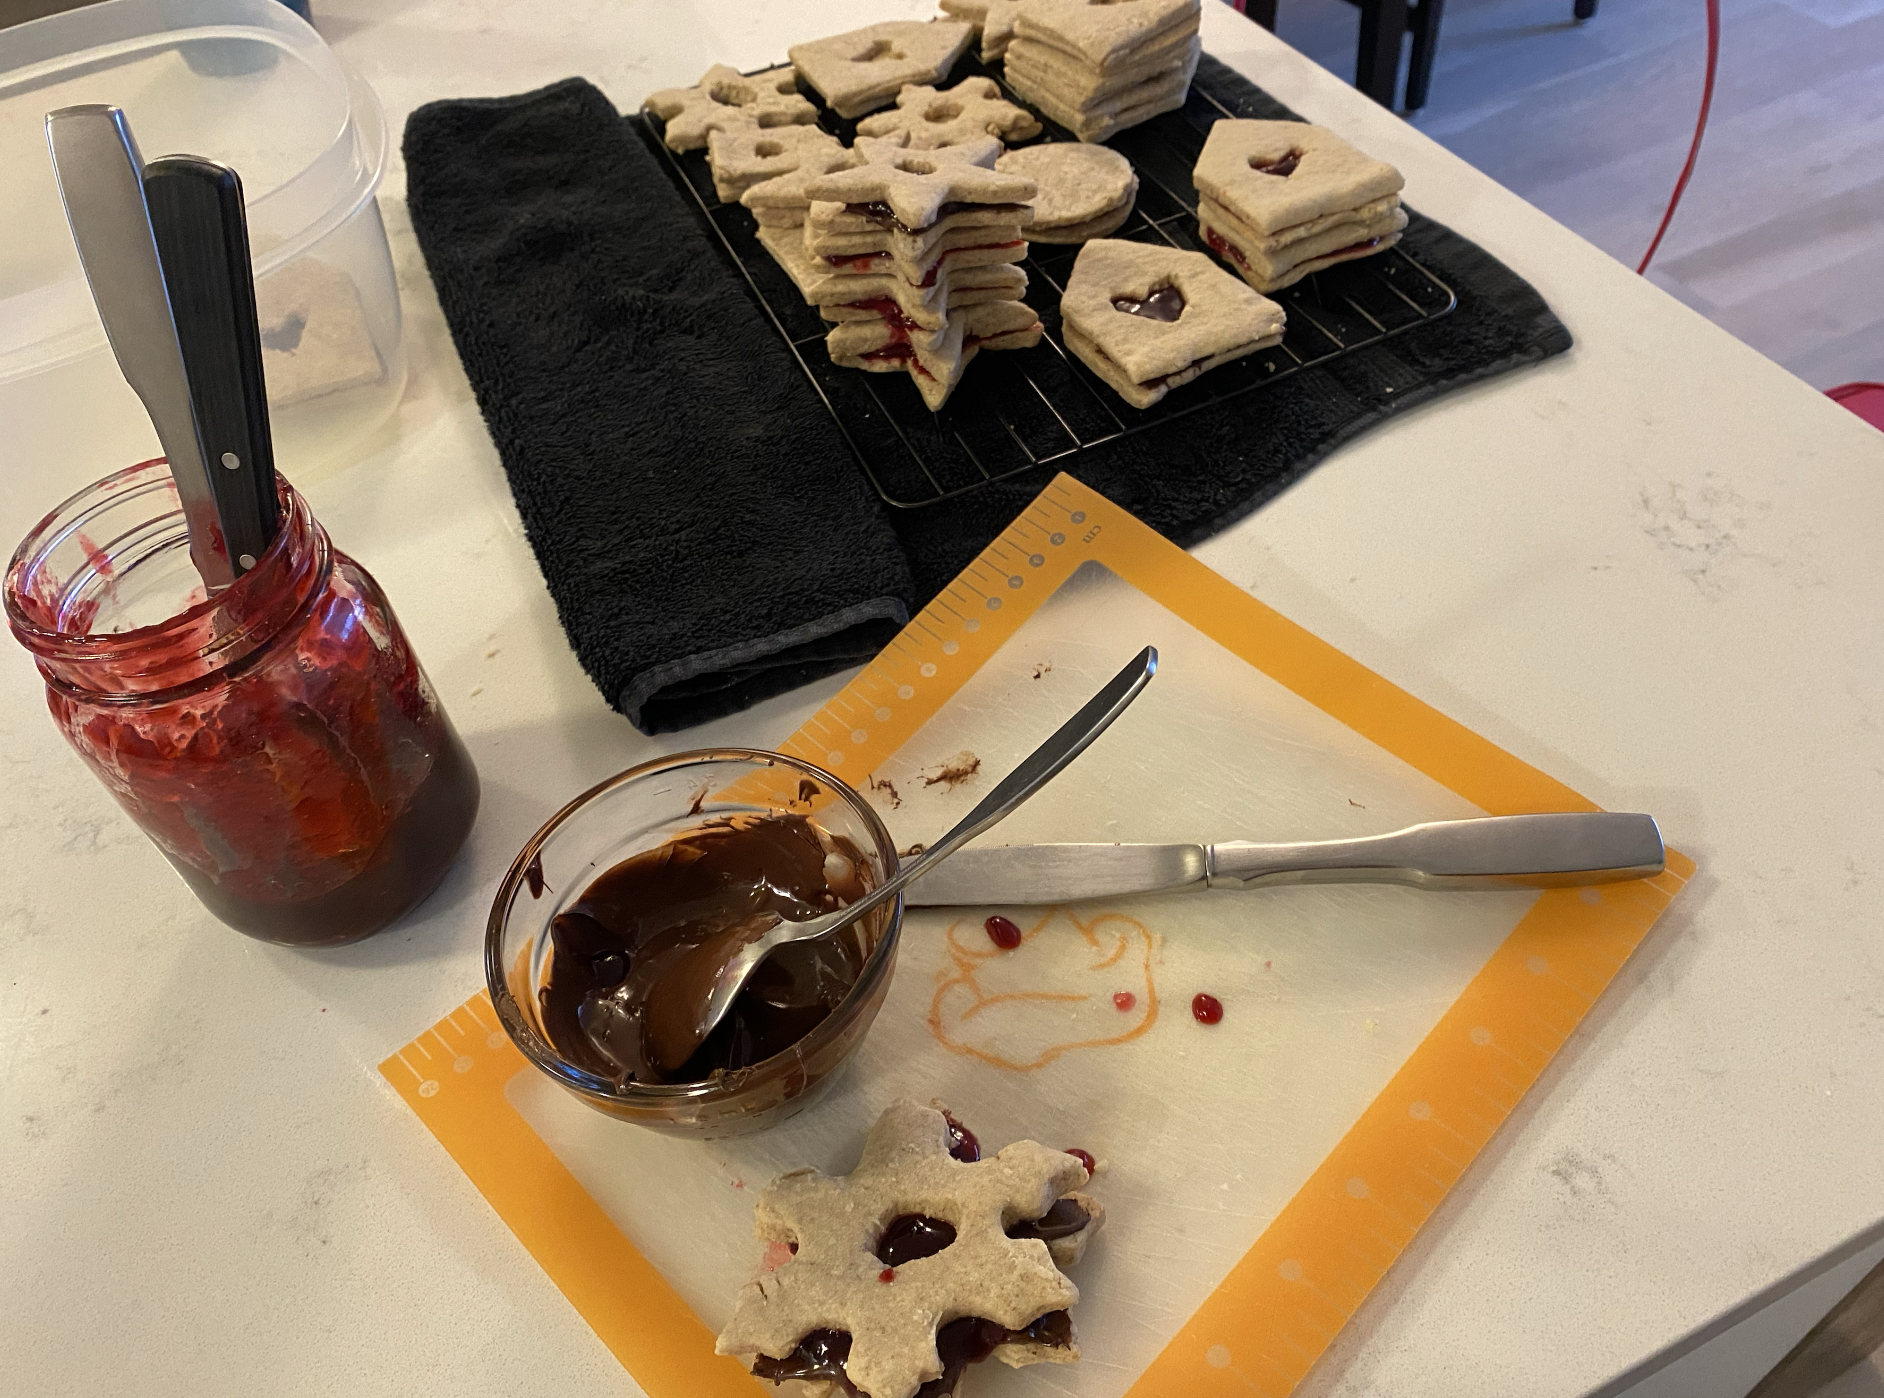
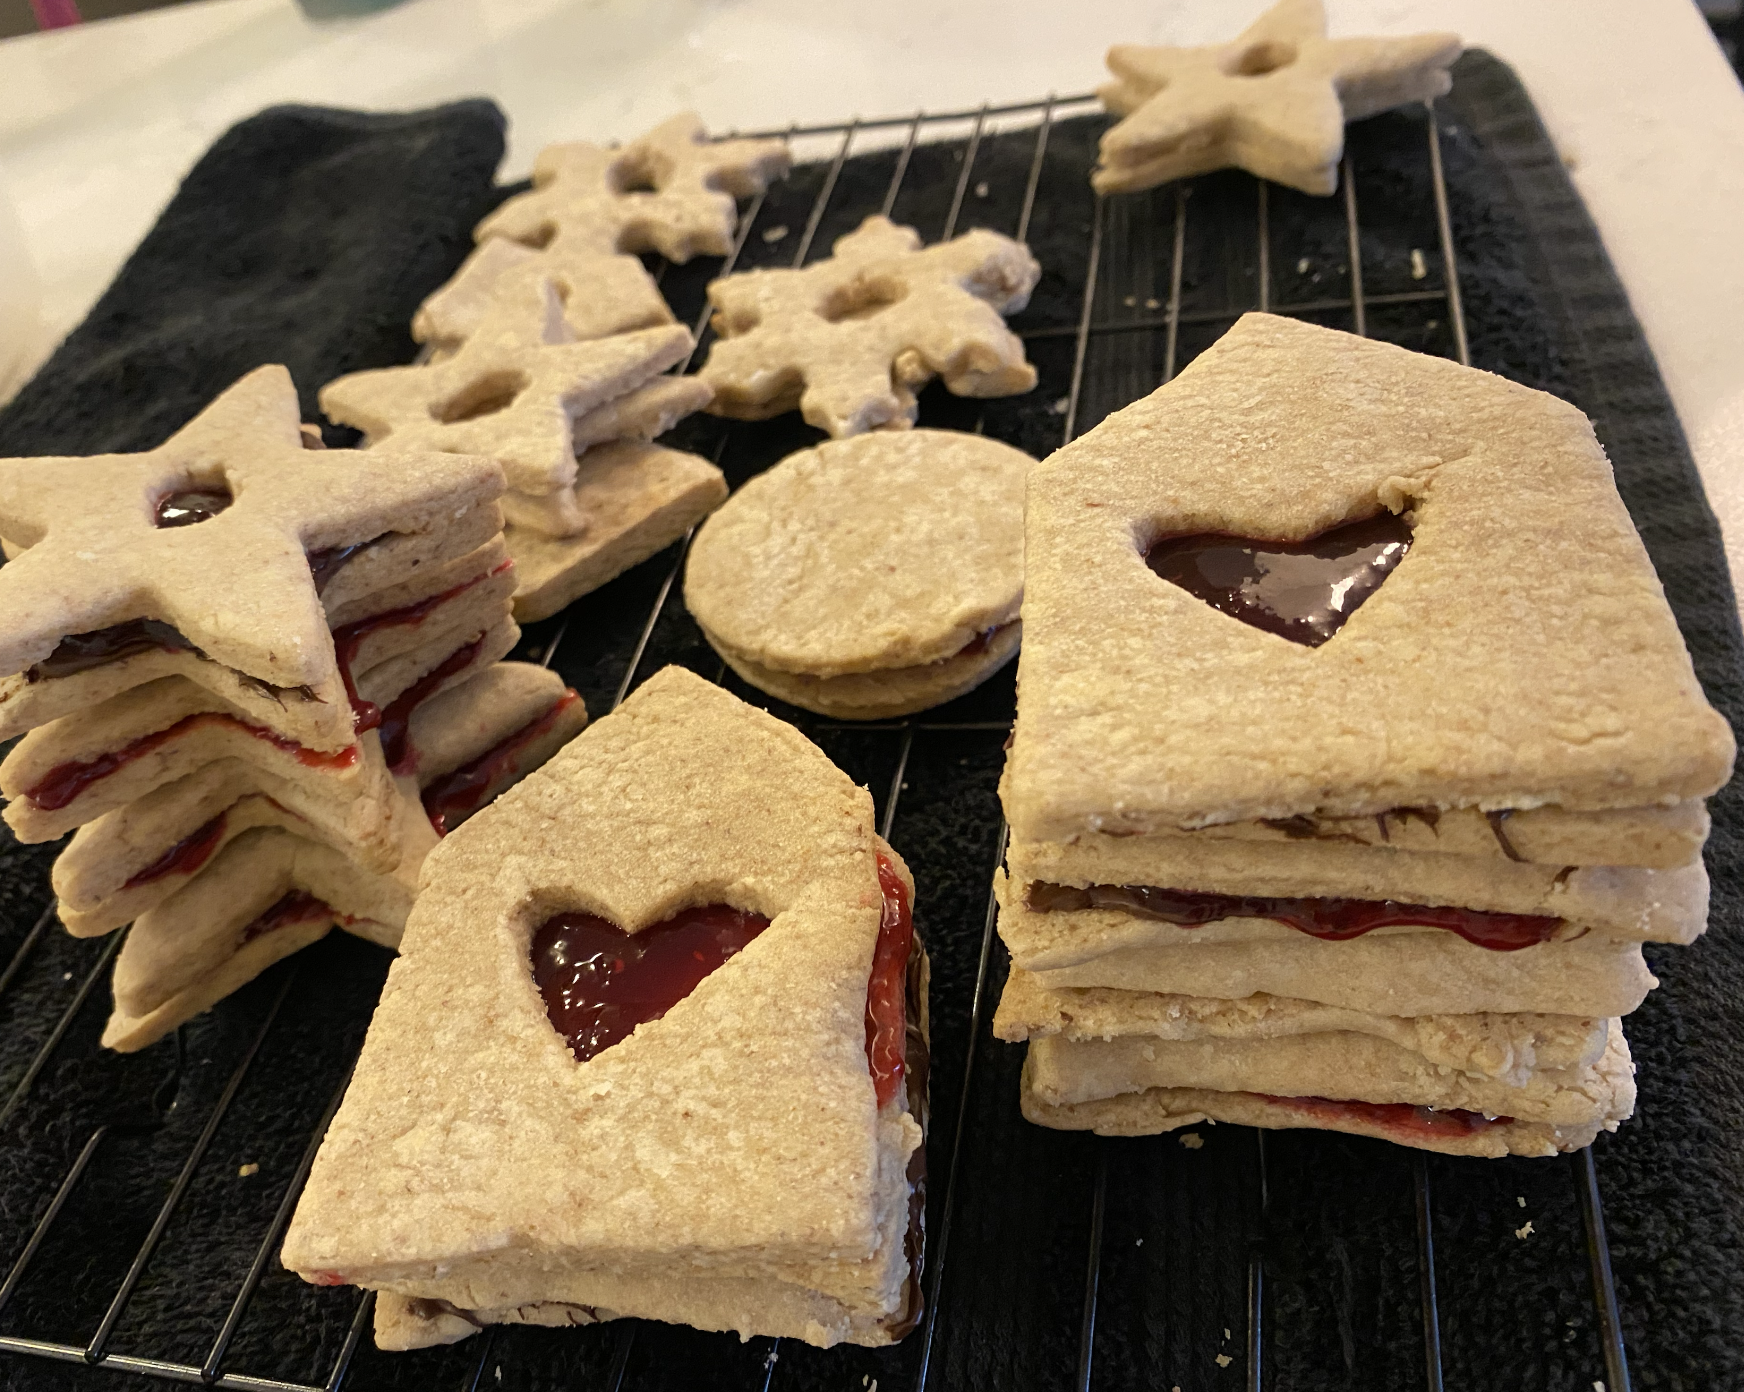
The next day was the best day – putting the cookies together so I could enjoy them! Along with the raspberry jam, I wanted a few to have a bit of chocolate, so I melted about a half cup of chocolate chips in the microwave until it was smooth and creamy. I spread a layer of the chocolate on the bottom cookie, followed that up with the raspberry jam, and finally I placed the top cookie. Some cookies turned out neater than others, but they all looked so pretty with the window of the jam. I packed most of the cookies up into a Tupperware since I was bringing these cookies to an upstate NY getaway. Once it was time for dessert at the cabin, I sprinkled some confectioners sugar on top and bon appétit! They were delicious!
I am editing a video of the process and should be posting it to my Youtube channel by this Friday (3/4/22). I will update this post with the link then!
If you try out these recipes, let me know! As always, if you have a baking challenge you would like me to try, be sure to send them my way! I’m always up for suggestions.
Sending you all lots of love,
Alanna

Leave a comment